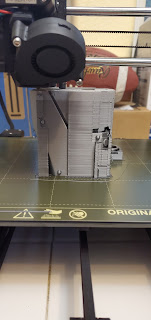
Last year, 2020, we purchased a 3D printer, with the initial use would be to print masks and face shield parts to donate for the medical community. We had always wanted one, but never really knew much about them. But, lots of people who had one were also printing stuff to help out, so we went ahead and got one. We printed out masks and face shield parts for a few weeks, and were glad we could help out in some small way.
We then played around with our printer, enjoying the fun stuff we could do, printing things to help Dean, things to play with, and all that. Then, after about 8 months, it clogged. The feeder tube stopped feeding the filament, and it no longer worked. We knew we needed to take apart the thing to see if we could fix it, but we "never got around to it". Fast-forward to September 2021, we asked a friend who we know has a printer to print some Mando weapons for us since ours was broken. He is a nice guy and of course offered to do that, and offered some suggestions to fix the old printer we have. Well, we decided to give up on that and bought a NEW PRUSA 3D printer, and the quality of this thing is awesome! We told our friend we got a new one and could print the guns, so we were off!
This is Mando's "Amban phase-pulse blaster" (I had to look that up). Dean found the pattern online for free so we went to town!
Here are the mando guns in progress!
Funny story. Liam (Jake's friend) asked if he was going to have "the back pack" for Boba Fett, and I said yes, if I have time, and had fully planned on making the thing out of cardboard and pipes. HOWEVER, Dean found that pattern too!!!
This thing is huge, and really really cool!!!!
This is us priming the 3D prints after gluing them together. Let me tell you, i'm not sure how people keep their 3D prints together, but we had the hardest time! Superglue works, but one tap and it breaks, especially the blaster! We will need to work on a solution for that in the future.
AND, after experimenting with paints, air brushing (I'll go into that once I get to the helmets again) and acrylic paint, here is the finished blaster!
Will post jet pack picture once I show you the helmet process first!


No comments:
Post a Comment